One of the foremost common queries we tend to get is, “How Do I Preview my Website Before DNS Change?”. Plenty of our customers need to preview everything before going live, to confirm they are working properly.
Here is a very quick and efficient solution for Windows and Mac that allow you to preview your website on your new server before changing your DNS and going live.
After completing the steps below and to make sure your browser is resolving to the new server, you need to upload a unique file to the new server and make sure you can access it in your browser.
Before proceeding, you need your new server’s IP address. This can easily be found by logging to your cPanel or by contacting our support team. For the sake of this tutorial, we will use 64.78.245.217 as our new server’s IP and yourdomain.com as the domain name you want to preview.
If you’re using Windows:
1. Locate the hosts file on your computer. Typically, for Windows 10 / 8 / 7 it’s located:
C:\Windows\System32\drivers\etc
2. Right-click on it and select Notepad.
But sometimes, even when you are logged on with administrative credentials, you may receive the following error message:
Access to C:\Windows\System32\drivers\etc\ hosts was denied
Or
Cannot create the C:\Windows\System32\drivers\etc\hosts file. Make sure that the path and file name are correct.
In this case, type Notepad in start search and right-click on the Notepad result. Select Run as administrator.
3. Once you get it opened you can start making changes. As with our Mac instructions you may wish to copy your original file just incase.
By default, a windows hosts file should be similar to the following:
127.0.0.1 localhost
You can add additional lines to this file that will point requests for a particular domain to your new server’s IP address (see screenshot in step 1 of Mac). Example:
127.0.0.1 localhost
64.78.245.217 yourdomain.com
64.78.245.217 ww.yourdomain.com
4. When finished, Save your changes.
5. You then want to flush your DNS cache by typing in cmd and the Windows search bat will appear on the right side. Right-click on Command Prompt and click Run as administrator.
Type in: ipconfig /flushdns
6. Restart any open browsers and then visit your website in the browser of your choice!
If you’re using a Mac:
1. Open Terminal inside of your Utilities Folder (Applications -> Utilities -> Terminal)
2. To be on the safe side, you should backup your existing host file, just incase. Simply copy/paste the following command and hit return:
sudo cp /private/etc/hosts /private/etc/hosts-orig
3. After you have a backup copy, you can then edit your host file. To get started, simply copy/paste the following command and hit return:
sudo nano /private/etc/hosts
4. You will then be prompted your admin password for your Mac user. Enter it just like you’re logging onto your computer and press return.
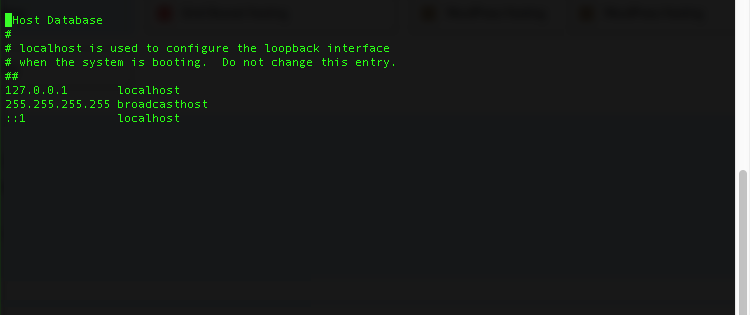
5. This will bring up your host file which looks something like this:
Host Database
#
# localhost is used to configure the loopback interface
# when the system is booting. Do not change this entry.
##
127.0.0.1 localhost
255.255.255.255 broadcasthost
::1 localhost
Below this, you will add your domain and IP address. For example:
Host Database
#
# localhost is used to configure the loopback interface
# when the system is booting. Do not change this entry.
##
127.0.0.1 localhost
255.255.255.255 broadcasthost
::1 localhost
64.78.245.217 yourdomain.com
64.78.245.217 www.yourdomain.com
6. After you add your IP + domain press Control + X to exit nano and Y and press return to commit the changes.
7. Once this has been completed, you need to flush your local DNS by typing this command and pressing return:
dscacheutil -flushcache
After you do that, close out your open browsers, and re-open to view your website on the new server!

Leave a Comment